sub_x=3 -> 3 divisions along X axis
|
|
In the sub directory images there are 3 small frames which you have probably already used to check your installation. If not please go to images and run process.csh, then check your result (checking installation).
Once you are in the sub-directory images, make a copy of the configuration file which was used for the example: cp ../register2/default_config . And try to process interp_test2.fits and test0.fits with this configuration:
../bin/mrj_phot test0.fits interp_test2.fits
then display the output file, for instance: saoimage conv.fits, or any visualization software...
In addition to the 2 variables, you will see large systematic residual from left to right. This is due to PSF variations in test2.fits. The solution to this problem is very simple, edit default_config and put deg_spatial to 2 instead of 0. You must also increase the number of stamps (more parameters to fit).
To summarize, make the following change in default_config:
nstamps_x
10
nstamps_y
10
deg_spatial
2
Re-run the image subtraction code (same as before, but it is worth making a copy of conv.fits before rerunning the code). And compare the result. The systematic residual have disappeared. In general there are such PSF variation in the images, and using this ability of the code is essential.
Another feature of this code is the ability to process the image by
small pieces. You can try that too. Come back to the initial configuration
(nstamps_x=nstamps_y=6, deg_spatial=0). But
modify the value of sub_x and sub_y, take:
nstamps_x
6
nstamps_y
6
deg_spatial
0
sub_x
3
sub_y
3
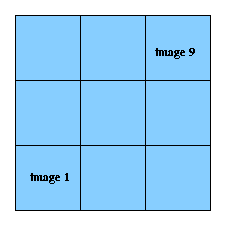
It means the image will be cut into 9 pieces which will be processed separately:
sub_x=3 -> 3 divisions along X axis
Then re-run the same image subtraction command with this set-up. Compare with our first attempt: it is certainly better than not dividing the image, although some systematic residual remains. If you compare to our experiment with deg_spatial=2 (variable kernel), you will see that it is really inferior. Basically sub-dividing the image corresponds to the first version of the method (Alard & Lupton 1998). Although we should not neglect the possibility to sub-divide the image. If you have big images, it can be more than useful. Let me show you a successful application of sub-dviding the image, take:
nstamps_x
6
nstamps_y
6
sub_x
2
sub_y
2
deg_spatial
1
Look at conv.fits, the systematic residual have disappear. The
subtracted image is similar to our best previous result, it was obtained
without sub-dividing the image, but with a larger degree for the spatial
variations. Try also deg_spatial=1 without sub-dividing.
Let's conclude this discussion with the effect of differential sky background variations. For this purpose there is a modified image named test0_bg.fits. This image has systematic background variations from one corner of the frame to the other. Try to process it with our simplest successful configuration:
nstamps_x
10
nstamps_y
10
sub_x
1
sub_y
2
deg_spatial
2
The run:
../bin/mrj_phot test0.fits interp_test2.fits
Have a glance at conv.fits, it is really bad...What can you do to fix that ? Just set deg_bg to 1:
deg_bg 1
Check conv.fits, it is just as good as before....
I hope these examples helped you to understand the meaning of the parameters.
For your own images you will need a bit of experiment to find the suitable
parameters. However, unless your images are particular (very under sampled,
very small, very large...), a standard parameter configuration will work,
for instance something like our last configuration. You need to make some
basic tests to see what you need precisely.